Automated Builds & Continuous Integration - Part 3
In Part 2, I walked you through setting up a build script for your solution. Now we’ll go through setting up a continuous integration server using Cruise Control.NET.
After attending JP’s Nothin’ But .NET course, my outlook on build scripts, CI servers, and what each is capable of doing for a project has been completely altered. I’m going to finish this series for the sake of completeness, but I’ll putting up a post about what I learned at some point in the near future (and I don’t want to spill too much as I know JP is planning on releasing a lot of that stuff this year).
CC.NET Server Setup
Start by grabbing the latest version of Cruise Control .NET and installing it using all the defaults. Assuming everything goes OK, you should see an empty dashboard when browsing to http://localhost/ccnet.
CC.NET Config
I’ll go ahead and assume you’re using Subversion for source control, though switching this example to Visual Source Safe, CVS, SourceVault, or whatever you happen to be using, isn’t hard at all.
The cc.net file specifies details for all the projects your build server should be building. Each project gets a project tag, which specifies the name and URL for the project:
Inside the project tag you specify when/where/how the build server should get the source, how to label successful builds, what it should do with the source once it gets it, and who/how to tell people of successes or failures, and much more. A full list of possible tags can be found on the main CC.NET documentation site, but we’ll walk through a basic setup. One thing to note is you must restart the CC.NET process every time you update this config file, otherwise the changes won’t take effect.
Start by defining a working and artifact directory, where the actual source code and CC.NET reports will live, respectively. I prefer to keep them separated out in their own folders for clarity:
C:\BuildServer\Projects\MyExtensions C:\BuildServer\Artifacts\MyExtensions
Next you’ll specify all the basic information needed for Cruise Control to access and checkout your repository in the sourcecontrol section. As I previously mentioned, there’s lots of source code providers bundled with Cruise Control, and even more available on the net. The executable is a pretty standard location, and is where the normal SVN installer puts it (and I usually check-in the installer with the rest of the CC.NET files):
C:\Program Files\Subversion\bin\svn.exe svn://svnServer/MyExtensions/trunk BuildServer password
The trigger section will define when Cruise Control should kick off the build process. I’ve defined two below, one every night at 10PM, and one that will poll Subversion every 2 minutes for a fresh commit and begin only if it finds one:
The tasks section will tell Cruise Control what to do once it gets a copy of the source code. Here we’ll use the built in NAnt task, which needs a base directory to execute in, and a path to the NAnt executable (which we’ve convienently commited right along with the source). With no target defined for the NAnt build, it’ll run the default one, which for us is build-server:
C:\BuildServer\Projects\MyExtensions MyExtensions\Internal\Tools\NAnt\NAnt.exe
The publishers section specifies, among other things, what to do with all the build script’s output, and who to notify for build success and failures.
For our config, we’ll use the merge tag underneath the publishers section to tell Cruise Control to combine all of our xml output files, including the ones from NCover and NAnt itself:
MyExtensions\bin\Reports\*.xml
We’ll also tell Cruise Control where to output the complete build report from each build, which is uses for display on its web page (so we’ll store them in C:\BuildServer\Artifacts\MyExtensions\BuildReports):
The last tag we need, again underneath the publishers section, is the email tag. It’s pretty self explanatory, defining an email server and address to mail from/to. One point of note is the user name’s defined in the users section must match the user names from Subversion:
Extra Files
 There’s also a
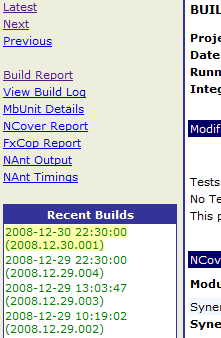
 dashboard.cfg file, which specifies how the web site displays build information for all the projects on the server (an example of which is shown on the right). I customized this one to include only needed report links and ignore others. This file, along with a few needed /assets/2008, XSL formatting files, and instructions on where they should all be copied is included in the download at the end of post.
Conclusion
The previous two articles gave you an overview of setting up a build script and continous integration server and actually walked through setting up a very simplistic build script for your company’s possible extension/utility library. This article gives you a quick run down of setting up Cruise Control .NET to run that build script after getting source updates, and emailing any needed developers about failures.
This is by no means complete, only an introduction to get you started. Windows and web based projects are totally different, and when you get into running nightly integration/smoke tests, production deployment, product packaging, etc, you can imagine how it gets pretty complicated. The best advise I can give for these situations is to look at popular open source products to get ideas. For example, Subtext has some awesome automation setup in both the build script and build server configuration. Definitely worth a gander.