Branch-Per-Feature in Subversion
Preamble
 Disclaimer: My team and I have only been doing this for a short time, so please, for the love of all that is holy, don’t take my word as gospel on any of this. We’re learning more about this each day, but we’re still far from proficient or experienced. I’m just putting what we do and what we’ve learned out there to possibly help others, as I know we would have loved to hear this when we started. If you blow up your repository and lose all your code, it’s not my fault.
That said, lets discuss what Branch-Per-Feature is and how it typically works. I won’t get into much detail on why you should do it or what it is here, as Derick Bailey has an excellent, though unfortunately unfinished at the moment, series of posts on the subject and they’re a must read to get a solid background on this. In a nut shell, though, Branch-Per-Feature is basically what the name implies - you create a branch in your source control system for each “feature” you work on (where the “feature” can be defined as big or as small as you want - we’ll skip doing this for typos and the like). You can then work on that feature in isolation in your own branch, committing your changes as often as you like and not screwing up your other teammates or being affected by them, until you’re all finished, at which point you merge the completed feature back into the trunk. Using this methodology, the trunk should always be kept in a “shippable” state.
Sounds easy enough, right? As is often the case, however, the devil is in the details. I’m sure the first thing that jumps out at you in reading about this is “how the hell does this work with multiple developers?”. Well, the theory goes that as you’re working on your feature branch, you continuously merge changes from the trunk (i.e. features other developer’s have finished) into your branch. This means instead of merging after 2 weeks of work and finding a crap load of conflicts, you have a few here and a few there. In practice it generally works out that way, too, unless you or a team mate goes on a refactoring rampage and you need to merge those changes in (I’m usually guilty of this myself - sorry guys!). Following SRP and the small class sizes that result from it helps in the fact that multiple people usually aren’t working in the same class, too.
Simple scenario
I’ll walk through the steps of a simplified “feature” branch from start to finish. Simplified here means you’re either working by yourself, or you know nobody else has changed the trunk while you’re working on your feature. As the title of this post alludes to, I’ll be showing this using Subversion coupled with TortoiseSVN, so I’m not terribly sure how it’ll work with similar source control systems. Also, while all the tools and practices that I’m going to show here do help with merge problems and the like, they’re not a substitute for using actual communication on your team inorder to avoid problems. Sorry, but you just can’t get away from talking to people :)
Note: all of this is shown with a version of Subversion & TortoiseSVN > 1.6, as many of these features have only been included since then. Make sure the server, client, and your repository are upgraded to at least this version (especially check the repository, which needs upgraded separate from the server, which we learned the hard way). Ask your admin if you’re unsure about any of this.
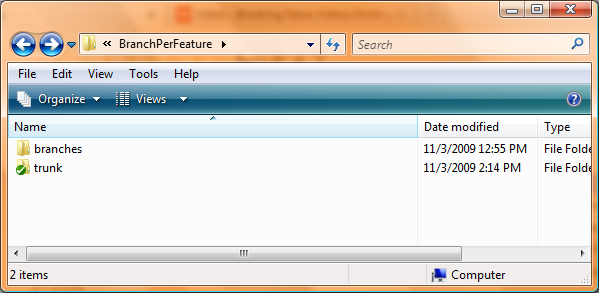
Now, say we have a repository named BranchPerFeature with the standard /trunk, /branches, and /tags folders. It has a simple console app that displays a welcome message. Call me weird, but I’ve never liked the SVN switch command, so I just setup a local directory structure similar to the repository’s:
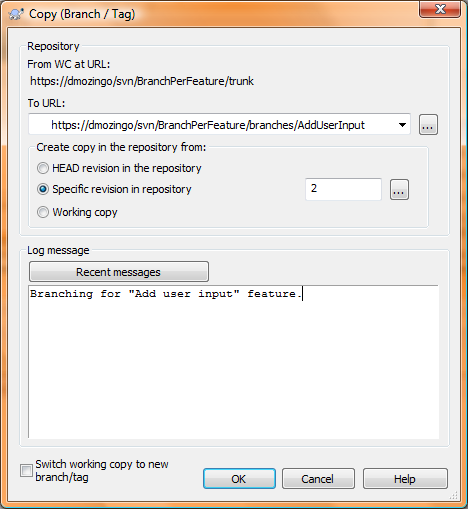
We’ll start by creating a branch for our new feature. Right-click your checked out trunk folder, then select TortoiseSVN, then Branch/Tag. In the To URL field, we’ll enter a path in the branches folder in the repository, usually named after the feature we’re working on. In this case we’ll create a branch in branches/AddUserInput (we’re adding a Console.ReadLine() in this feature - exciting, huh?):
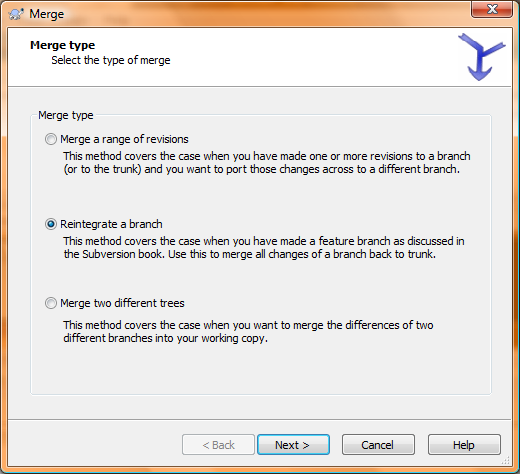
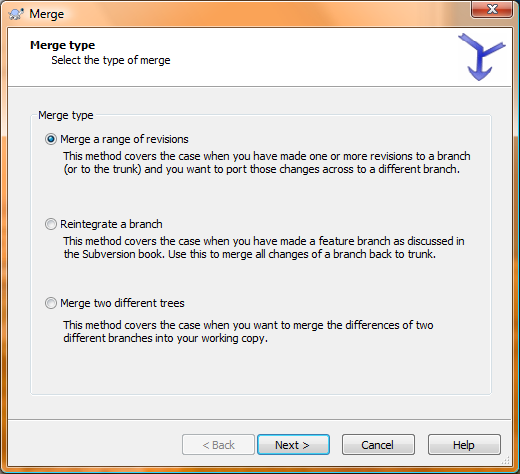
Now you can checkout that new branch in your local branches folder and start working on the feature, committing as often as you’d like knowing you’re not affecting anyone else. When you’re all done and everything is committed to it, we’ll merge it back into the local copy of your trunk. Go to where you have the trunk checked out, right-click and select TortoiseSVN, then Merge. Of the three options you’re presented with, select the second, Reintegrate a branch:
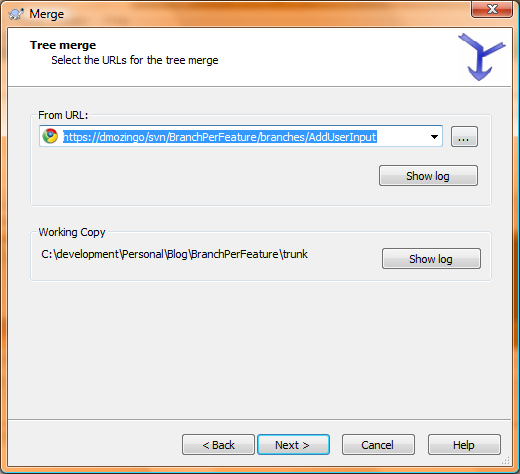
We’re merging from our branch, so enter its repository URL in the From URL and hit next:
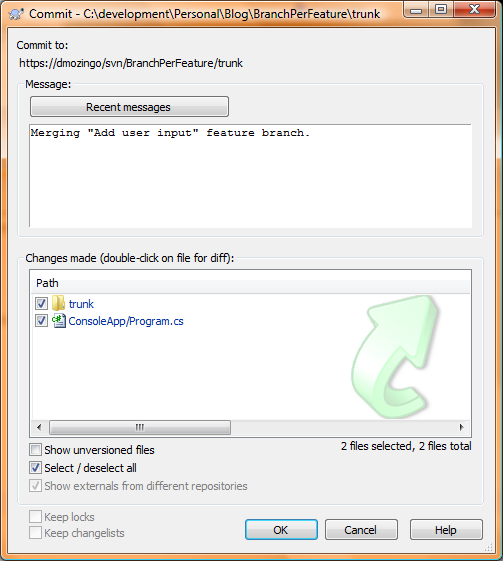
Hit Merge on the final screen (or use the Test Merge button to do a dry-run that won’t affect anything). Remember, at this point all changes made from your branch, and applied to the trunk, are only local. Now open the updated trunk, run all your unit tests and whatnot, then commit these changes to the repository:
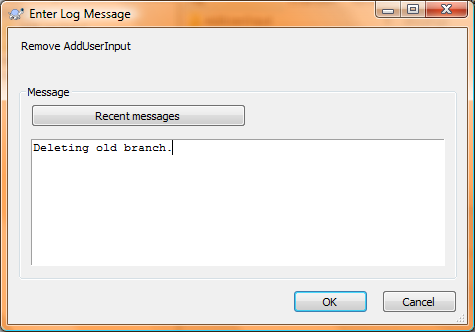
Congrats! Your first feature branch is finished and merged back into the trunk, hopefully with no problems. One major caveat of this procedure is you must not use your branch again after it’s merged back into the trunk. Why? Well, Subversion keeps some properties set on all your files/folders so it knows what revisions have been merged back into them, and continuing to work on your now stale branch and trying to merge it back into the trunk again at a latter point would be bad ju-ju. To make sure nobody accidentally uses your branch, be sure to “delete” it from your repository (don’t worry, the history is still available, just not readily available). To delete the branch, right-click on your checked out trunk folder, select TortoiseSVN, then Repo-browser. Navigate to your branches folder in the left pane, then right-click and delete your old branch:
A bit more complicated scenario
So you created your branch and you’re happily committing away when you see someone else committed to the trunk. Uh oh. Fortunately, it’s really not a big deal. We’ll just merge the new revisions from the trunk into our branch every now and then to keep it “current” with the trunk. Then when you’re done with your branch and go to merge it back into the trunk, it should theoretically merge without problems, as it’s the same as the trunk except for the changes you’ve made.
To show this, we’ll create a new branch to add a prime number calculator to our app. Same steps as above. After we’re working on the branch, though, we’ll commit a change to the trunk to simulate it being a co-worker’s change (it can be anything, even a conflicting change if you want). Now it’s time to update you branch!
First, check-in any changes you’ve made on the branch (this allows you to roll back the coming updates if they blow up, among other things). Then right-click on your checked out branch folder and select TortoiseSVN, then Merge. Choose the first option this time, Merge a range of revisions:
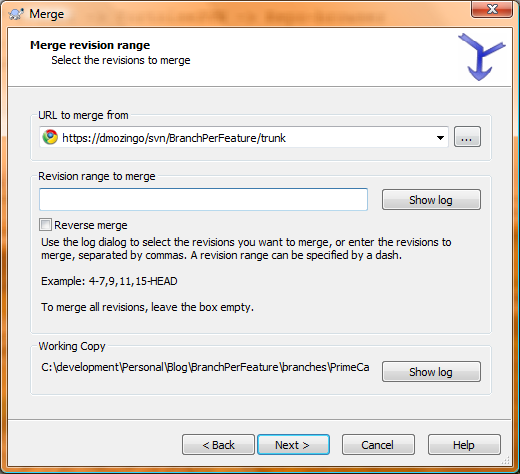
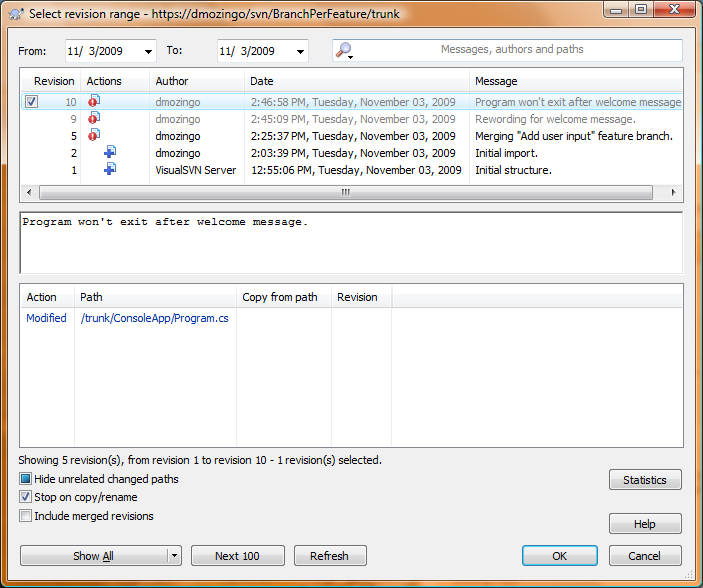
Make sure the trunk is specified in the URL to merge from field on the next screen. Leave the Revision range to merge field blank, as Subversion tracks which revisions it already merged in automatically and won’t try to re-merge them (which is new in version 1.6 - for older versions you’ll have to track this and specify revision ranges by hand, and trust me, it gets messy real quick):
If you hit the Show Log button on this screen, it should show revisions that have already been merged in gray:
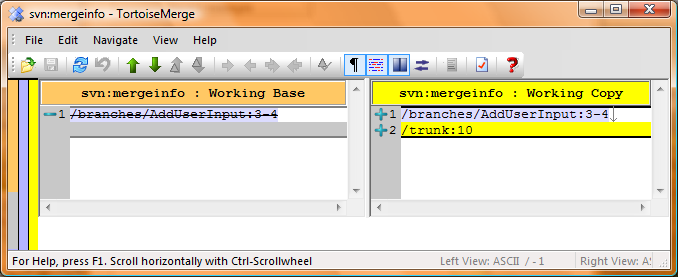
As a quick side note, when everything is done, you can do a diff on the files and see how Subversion tracks previously merged revisions on each file & folder:
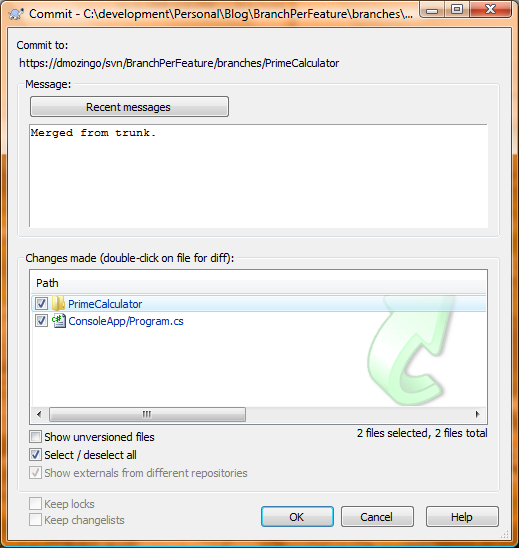
After hitting next, you can hit either Merge or Test Merge (just like before), and make sure everything gets updated. Deal with any file or tree conflicts here, and run all your unit tests to make sure these new changes are still hunky-dory with your stuff. Then simply commit these new updates to your branch:
Keep up on these trunk updates while you’re working on your feature, and when you’re done and it’s time to merge back into the trunk, you shouldn’t have any (or at least not many!) issues or conflicts with it.
Monitoring the trunk
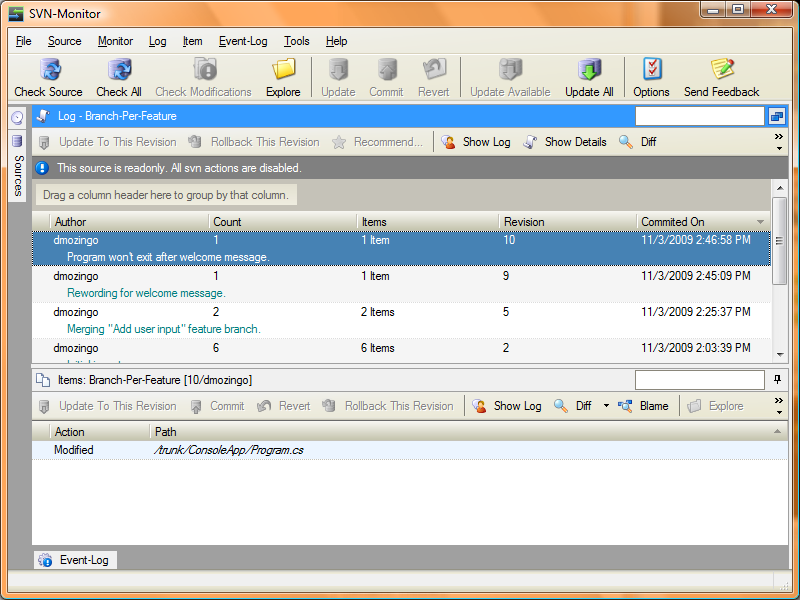
How can you know when changes are made to the trunk? Well, you can have everyone yell out when they commit to the trunk if you work close enough, you can email everyone, or you can get a tool to monitor the repository for you, such as SVN-Monitor which is quite awesome and totally free.
I set this up to monitor our trunk so I know when changes are made, with both a nice pop-up balloon and an email. Here’s a view of this sample’s trunk:
Complex scenarios
You’re bound to run into issues now and again with this workflow, especially on larger teams, having a more complicated branching setup, or if you’re doing a lot of file shuffling in the trunk or your branch (as its been my experience that, in general, SVN doesn’t deal well with file moves/renames beyond the simple cases). I’m also working on a 3 person team, so I can’t speak as to how well this scales up to a 15 person team size.
I’m not pretending to cover every scenario or issue you’ll run into in this post, either, so accept that fact that you might, and probably will, have to either Google around for an answer to some weird error and drop down to the command line to fix something. You might as well know that going in.
Issues?
The biggest issue I have with this workflow so far is the time taken to create a new branch, mostly comprised of the time spent checking-out and updating R#:
- Check-out time: as I mentioned, I don’t like the switch command (though it would probably solve this issue). We’re work on a large, and rapidly expanding, code base with over two dozen dependencies and lots of code files. It simply takes a while to check out a new branch (ok, in reality it’s only a few minutes, but still annoying).
- Updating R#: I love the solution wide analysis R# offers, but it takes a while to scan everything when you open a newly created & checked out branch. This is on a quad-core machine with 15k RPM drives, too.
These issues, while not show stoppers by any means, are still annoying to me none-the-less, and I thought I’d mention it.
Wrapping up
So there you go. Common usage scenarios when using a branch-per-feature workflow with Subversion. Not too complicated. As I noted in the begining, we’ve been doing this for a short while now and it’s working quite nice, as before we’d just make one branch for each iteration, all work in that, and merge with the trunk when done. That meant if one of us was making breaking changes, we’d simply not commit until we were all done. That’s pretty risky. What happens if our machine crashes after 4 days of work, or we wanted a file back from a few days ago? Not cool.
It’s worth noting that, from what I understand, Git’s workflow follows this pattern by default. I’m planning to dive into that soon.
If I messed anything up in here, or you know a better way of doing it, please let me know!